Thursday, December 11, 2014
Who helped:
- Sheila
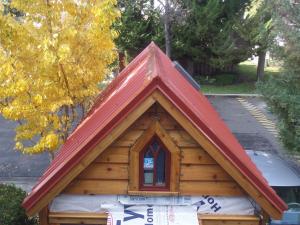
I’m pretty excited! Yesterday, I finally finished installing the roof on my tiny house. It is all watertight now, just in time for the rainstorm today. I worked hard to get it done. I think I put in about 12 hours and I was installing the last few screws on the ridge cap in the dark, with a headlamp on. I don’t know why, but every time I’m working on a roof, I seem to find myself up there after dark with a headlamp on. It was worth it, though. It was so nice to go to bed last night knowing that my tiny house would stay dry today.
Part of the reason it took me so long to install the ridge caps yesterday path was that I had a good amount of preparation work that still needed to be done before they could be installed. First, I needed to install the gable trim on the front of the house which I was unable to finish last weekend. Next, and perhaps even more importantly, I had to drill some holes in my roof sheathing in order to provide a ventilation path out the peak of my roof.
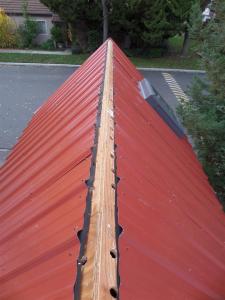
I have been dreading drilling holes in my roof for quite some time. I really wasn’t sure how I would do it. However, it turned out to not be that big a deal. At first, I tried to drill the holes from inside the house which proved to be a bit difficult. The worst problem was all of the wood chips that my 1″ spade bit spit out and rained down on my head. For a while, I tried to protect myself by wearing a hooded jacket, goggles at a face mask but after drilling a few holes that way, I decided it might be easier to tackle the project from the outside. This was a great choice. It did force me to climb up on the peak of the roof which I was kind of afraid to do. However, I quickly discovered that being on the peak of the roof was no problem at all and it made drilling the rest of the holes a piece of cake.
Of course, it still feels kind of wrong to drill holes in a perfectly good roof. However, I’m told that this is a quite normal thing to do and absolutely necessary if you want to keep from turning the underside of your roof into a mold farm (click here to see Ella’s post on the grossness of mold).
The other part of the reason it took me so long to install the ridge caps was that I spent some time being particular about things that I probably didn’t need to be that particular about. For example, I practiced for at least an hour or so figuring out exactly how I wanted to fold the end of the ridge cap over so the peak would look nice. I practiced on some scrap pieces for a while and eventually came up with a rather detailed fold that I kind of like.
I also spent a bit of time trying to figure out exactly where the ridges would fall underneath the ridge cap so I could pre-drill all the holes for the screws. This turned out to be a wasted and perhaps even slightly detrimental effort. First, all of the holes on one side ended up being about 1/8 of an inch off which meant that I kind of had to screw into the sides of the panel ridges instead of the centers. I discovered later that it was easier and much more accurate to simply install the screws, without pre-drilling the holes. The screws were self tapping, so all I really needed to do was mark the location for each screw with a center punch before drilling them in. That is what I did for the whole second half of the ridge cap which went much faster.
Because crawling around on the peak of my roof worked so well for drilling the ventilation holes, I decided to try it again for installing my ridge cap. I have now decided that being on the peak of the roof is the only reasonable place to be while installing a ridge cap. I simply hauled my impact driver and all my screws up with me on my tool belt, straddled the peak, made sure the ridge cap was centered and screwed it down.
As I mentioned earlier, I did not get the last few screws in until after dark. However, there was no way I was quitting today until I was done and my house was watertight. California is expecting quite a bit of rain today and I say let it come.
Favorite part of the day:
- Of course, finishing my roof was wonderful. However, I also really enjoyed climbing around on the peak of my roof. I use to spend all of my weekends riding my bicycle. Now I spend my weekends riding a house.


Hey Russ, I’ve been reading your blog post extensively today to see what kinds of things I have missed thinking or worrying about. It’s raining here in Santa Clara on Christmas Eve day, and pretty heavily at times. Feels good to have a watertight house for sure, so I decided to look up your post on it. It is uncanny because we were watertight on December 10th as well. I just think that is too cool. Anyway, thanks so much for the OCD-level of detail on documenting stuff it has really been helpful to me to see things I missed and hear of different approaches. I don’t feel so much like I’m going where no man has gone before.